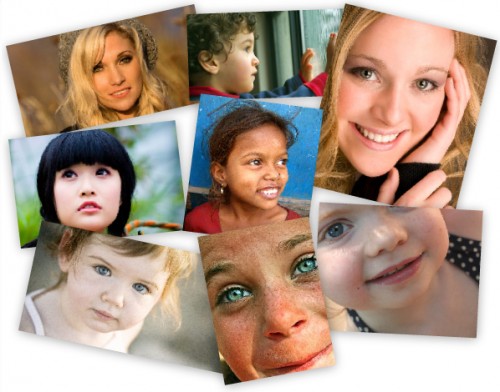
In the time of digital technologies, point-and-shoot cameras let you take unlimited number of instant pictures almost anywhere and anytime. That is why most amateur photographers result in having a bunch of bad snapshots of themselves and family and not one fairly decent photo that is worth hanging on the wall.
In this article we’ll tell you about some сommon flaws that can ‘kill’ any portrait photo. Avoid these mistakes, and you will be able to make your photos more ‘professional-looking’.
1. Red eye
You still don’t bother to fix red eye in your photos? Unless this is a photo from a Halloween party, you must get rid of those spooky red eyes, because they really make your photos look rubbish! By the way, prevention is easier than cure. Do you know that people have red eye only in flash photographs? The reason for that is the reflection of the light from the flash off the eye’s retina. Do not use the in-camera flash, and you will not get the red eye in your photos.
If you do result in having the red eye in your photo, be sure to fix it. One of the painless ways to do so is to upload a photo to http://makeup.pho.to/ or http://enhance.pho.to/. These online services automatically remove red eye from pictures without you having to click on the red eye, or select the eye area manually. Just upload a picture, and the red eye is gone!
There are other options that the services offer (e.g. removing the face shine, smoothing the wrinkles), but you can uncheck them if you don’t need them.
2. Distracting and messy background
Understand what we are talking about? Trees and other stuff growing out of people’s heads, cluttered background, lots of distracting objects or unwanted people in a photo… All this takes attention away from the most important thing in the photo – your subject’s face. So when you are about to take a photo, look at what will be behind your subject and try to keep the background simple.
But if it’s too late to reshoot, try saving your almost perfect picture ruined by cluttered background with some post processing. A quick and simple way is applying some background effects to a photo, like those you can find here.
There is a decent choice of backgrounds – from romantic ones (hearts, etc.) to those that kind of imitate a nature background. This quick solution can save your bad background photos in some cases:
3. Improper camera settings
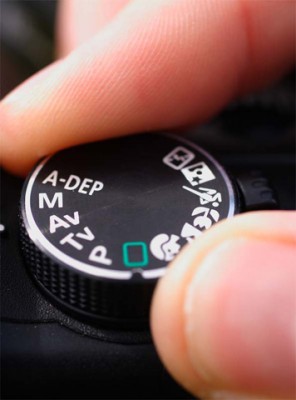
We can bet it that you take most of your shots when your camera is in the “little green box mode” (i.e. automatic mode). Let’s try to spice things up =) Zoom in and step back until the subject fills the frame (but be sure to leave some space around). Take a picture. This simple trick lets the background go out of focus thanks to a wider aperture, so the background doesn’t look distracting and makes the focus on the person you are photographing.
As you see, larger aperture works best for portraits, as it ensures that you have a shallow depth of field. You can go even further and try the following trick to get a beautifully blurred background (especially if you are a happy owner of a DSLR camera). Turn your camera into the Aperture Priority mode (usually designated as ‘A’ or ‘Av’) and dial the aperture number (a number like 2.8 or 5.6) as low as it will go. Take the shot. Now it rocks!
If you use this technique, the background of your portrait photos will never look messy and distracting (see the previous paragraph =))
4. Bad lighting
When it comes to photography, lighting is always a key factor. Some beginner photographers believe that the more light there is, the better. But what really matters is the light quality and direction. The goal is to make sure the person you are photographing is well lit, but with no harsh shadows. Direct sunlight (which is hard and contrasty) is largely unfavorable for taking portrait photos. This kind of light will cast harsh shadows on the face; besides, looking into the sunlight will cause your subject to squint. So sunny midday is definitely NOT the best time for portrait photos.
What is then good time for taking a good portrait? The best time for portraits is during a few hours in the early morning and afternoon, when the light is soft and produces attractive results. Overcast days with natural cloudy light are also good, as clouds diffuse the sunlight and the shadow transitions are soft. If for some reasons you have to shoot at sunny midday, find some shade (probably a side of a building) where the sun will not shine directly on you and where there will not be strong shadows on your subject’s face.
5. Using on-camera flash
It is hard to believe, but using on-camera flash is really quite evil for portrait photography. Flashes create strong highlights and can really wash the face out. Flashes are also the reason of red eye, as we said before, and also put an unflattering shine into people’s faces.
So, the rule is: never use a flash when you can do without it. Natural light works best. Go outside if the weather allows it. If you shoot indoors, get more natural light by getting closer to windows. But unless you want your subject to look like a shadow puppet, avoid backlighting from a window. Just turn your subject and use natural side lighting instead.

(The photo on the left is by Steve Kelly)
6. Unflattering face expression or bad posture
We are sure you have seen dozens of photos where people appear with half-closed eyes or goofy faces caught in conversation. You can do your best to take great pictures but your subject can blink his or her eyes at the exact moment the shutter snaps. Getting great expressions means taking a lot of photos and trying to stay alert when the perfect moment occurs. Take as many pictures as you can, ask your subject to pose again and experiment with different angles – you will have a lot to pick from when you are done.
Also, try to choose angles that are most flattering for the person you are photographing. E.g. if your subject tends to have a double chin, avoid photographing him or her from low angles – this will look especially unflattering.
7. No post processing at all or too much of it
Natural beauty comes first, so be sure not to overdo with ‘glamourizing’ a photo. Still it is a good idea to use some post-processing to make the photo look more flattering, e.g. to smooth out imperfections in faces. It is best to use advanced photo editing software like Photoshop, but it is also a time-consuming way. If you want a simpler way to touch up a portrait photo, try uploading it to Makeup.Pho.to. It is a fully automatic online service that has several options to offer (you can check out the options that you don’t need). In the photo below, we used the skin makeup, shine remover and teeth whitening options. The portrait still looks natural, but much more flattering.
And the final tip is: you are going to have the best portrait when your subject looks and feels confident. So make them comfortable, make them smile, and take pictures in their natural element – this will result in fun and natural pictures!


🙂
I will immediately seize your rss feed as I can not to find your email subscription link or newsletter service. Do you have any? Please permit me understand so that I may just subscribe. Thanks.
Please subscribe to blog.pho.to RSS feed from here – http://blog.pho.to/feed/
I’m glad my photo is such a great example! It’s licensed under Creative Commons Attribution, so you need to credit the original photographer. You can learn more about Creative Commons Attribution here… http://creativecommons.org/licenses/by/3.0/
My original photo is here.. http://www.flickr.com/photos/barkbud/4867632664/
Hi Steve!
We mentioned your name. Big thanks for your photo! =)
Pretty! This was a really wonderful post. Many thanks for providing these details.|